Sunday 30 January 2011

Away for a Week!!

Once again I have fallen behind in my blog, but you can't blame me, I came down with a bad case of tonsillitis which was not fun at all!  Also Graeme had to back to university which is very upsetting, but I am counting down the days now until he is back for good!! It felt like a complete waste of a week and weekend (that's 2 in a row ruined now!). I would have thought being at home would give me lots of time to craft but for 75% of the day I was sleeping and the rest I just didn't have the energy!!  It was only fortunate that I had already taken the photos and drafted my last piece that I managed to post at all last week.  Oh well no point in dwelling on the past better look forward to the next week, and actually try and complete some of the projects I started over the last few months (some things which I was supposed to finish for Christmas but never got around to it!!).

Checklist


Progress: Cut out shapes from felt. 
I had to go and buy more buttons and fabric to make the flower decorations, and I know I probably could have made use of what I have already but wanted to get something new.  With such a busy Christmas I have only just recently managed to get to the market (which is only open on Fridays and Saturdays) to get all the pieces I need.  So my friends and family will just have to wait a little longer for their presents, it's the thought counts right??


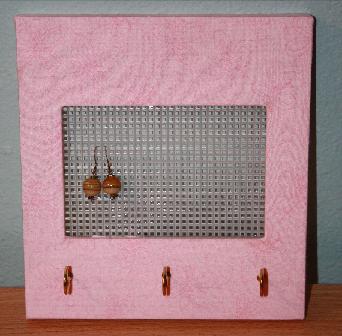
Progress: De-canvased the wooden frames.  
The staples were almost impossible to get out and even with pliers took ages. I'm ashamed to admit it but I did this whilst I was still ill and later that night I thought my illness had got worse and I was developing a rash all over my hands it wasn't until the next day I realised it was just blisters from the pliers whoops lol!  They really are quite sore!!


Progress: Currently learning to knit.
Before letting myself loose on the posh expensive wool I decided it would be a good idea to actually learn how to knit so took some wool I had left over from a previous project and just started knitting.  I soon realised its a little more complicated than I thought, but my Mum was really helpful and I managed to do a sample piece learning the different stitches.  There are a few dropped stitches and holes and some how I gained 3 extra by the end but for a first attempt after years I think I did pretty well, and it was really all I had energy for this week.

So I'm plodding along at a slow rate, but I have hundreds of new ideas from my new favourite website pinterest.  Which is a fabulous virtual pinboard where you can post collections of things you love from all over the web.  It is the best place to find new blogs that have similar interests to you and is just a fountain of new ideas!!  I have added my name to the waiting list as they are still testing in beta, I hope to get a login soon and start making my own collections!!

Saturday 22 January 2011

Lemon Lamps

Just before Christmas I went up to visit my University friends for our annual Fake Christmas meal.  Unfortunately we didn't manage one last year because everyone seemed to be at other ends of the country so it was great to get together and see everyone, I miss them all, it's weird living and working with the same people for 3 years and then we just left and returned to "normal" life.  I persuaded Dad to come up to London with me and we went to Camden market to find some extra presents.  It was AMAZING!! So colourful and lively and so many stalls with handmade goodies I was in heaven.

My favourite find of the day were some very colourful lamps by elementry and when we looked closer we discovered that you have to make them yourself from lots of pieces of the coloured plastic which interlock with each other.  I couldn't resist and Dad bought me a lemon lamp and some other colours as a Christmas present.


It seemed so easy watching the woman on the stall putting them together but when I opened them on Christmas day it was a different matter.  Try as I might I could not makes heads of tails of the lemon design, I would get to about half way then just couldn't get any further.  Below is what the lemon lamp should look like!!


So I decided to give up and go back to basics and start with a smaller and hopefully easier design.  I made this Pink and Red squashed sphere which looks amazing when lit, although I do feel as though I have entered the Red Light District.  This on can only be used for special occasions!!


Graeme used some of the lemon yellow pieces to make a sphere which also looks very pretty and makes the room feel very sunny.  Although I think we will need to make it a little larger as although I'm using a tiny electric bulb it started to get quite hot and I didn't want to melt the plastic.


I will definitely have another go at the lemon, but maybe I will just make it up in the middle lol!!

Tuesday 18 January 2011

Pink Strawberry Chocolate

During our attempts to make cake balls yesterday we wanted to see if it was possible to dye the chocolate.  We used a few drops of red food colouring in the bowl but I think we may have added it too early, as the chocolate then didn't want to melt and started to resemble butter cream icing. We attempted to coat one ball but it fell apart so instead we decided to just turn it back into a chocolate bar.  I took inspiration from Hotel Chocolate and made a rectangular slab of the stuff and sprinkled it with all the left over chocolate we had from making the balls.  We also added a touch of strawberry flavouring and do you know what it may have looked odd but it actually tasted really nice!!


Monday 17 January 2011

Bake a Cake Pop

At the weekend I persuaded Graeme to make Cake balls with me (it didn't take much). So we set out to Sainsbury's and picked up some Betty Crocker Devils Cake mix and Chocolate frosting (I looked everywhere for cream cheese like the recipe but there wasn't any so butter cream will have to do).


Making the cake was very easy as we used cake mix but licking the bowl out afterwards did not taste half as good as when I make my own cake mix, so I will do that next time.  Because we knew we just had to crumble the cake up I decided to use a deep baking dish, which made an awesome slab of cake.  This would be excellent if you wanted to make a shaped cake (maybe in the future!).  There is a small bite mark out of the slab because we got a little peckish and wanted to try it out!!

 While it cooled we ordered in Indian and watched Star Wars II in HD which was most excellent, even if Graeme did nod off at the end hehe!!  After dinner we got down to the messy work of making the balls.  And I think for a first attempt they came out very well.  We made half with chocolate frosting and the rest with vanilla frosting that I already had.


The recipe said to leave them in the fridge to harden for a few hours, as by this time it was quite late and I had to be at work for 7am on a Sunday morning yuww!! We decided to leave them overnight and decorate them the when I got home the next day.  Unfortunately this didn't happen as I got stuck at work because of lots of installation problems and ended up doing a 15 hour day and not getting home until after 10am!!  So Graeme and I finished them off tonight, I just hope they haven't gone too stale in the fridge.  Oh and one good thing about yesterday was on my lunch we went to the local farm shop which had lots of American imported food including Betty Crocker Cream Cheese Frosting perfect for next time, can't wait to have a cake pop party!!


So here are our final results...


They are not perfect, coating them in chocolate was a lot harder than we thought.  We also picked up cooking chocolate instead of the normal kind so the coating doesn't taste amazing.  Also I think we added too much frosting to the cake mixture they are so sweet you can only eat one at a time!! For a first attempt they are pretty good and it will give us something to work on next time. Now we know what we did wrong we can try again and make it better next time.  And don't worry I'm sure they will all still be eaten!!


Friday 14 January 2011

Cake Pops

A while ago I was reading a few articles on Etsy and came across one by a blogger named Bakerella.  She makes the most awesome cake treats called Cake Balls which you can also get on a stick called Cake Pops.  Even better the article had full instructions how to make and decorate them yourself, I couldn't wait to check out her blog for other treats!!


I was not disappointed, these designs are so amazing and the recipes seem quite simple with amazing results (we will have to see!) I have decided that I have to make these when I next have some free time.  A few of my friends would love these Bumble Bee Cake Pops as they are avid supporters of the Bracknell Bees Ice Hockey Team.


And these Pink Chocolate Cake Pops will be perfect for Valentines Day, I know Graeme will love them!!


I even found some Lego Cake Pops by one of her fans, totally awesome!!  


I think it's time for a Cake Pop Party!!!

Monday 10 January 2011

Projects for the New Year

I currently keep my earrings on my bedside lampshade, I know this sounds weird but it is a very handy and a sturdy place to hang them so they don't get tangled.  Although I have such a ridiculous number of earrings the the lampshade is becoming very full and a little unstable, so I had to come up with a different way to store them.  I had a quick browse around the internet for tutorials and a lot of people were using old picture or canvas frames filled with thin mesh or chicken wire to poke the earrings through.  I also found designs where they had covered the frame in fabric or paper and screwed hooks into the border to hang bracelets and other pieces of jewellery off.  I love this printed paper design by Decelerate, you can purchase the tutorial over at Etsy.


I really wanted to incorporate the earring hanger as well like this tutorial I found by Vanilla Joy.


So to compromise I plan to make a collage of frames, a couple for earrings and a couple for everything else, all in different sizes and fabrics.  (I have a quite a large collection of cheap canvas' which I used to decorate my uni houses with).  I think this could make a very nice statement on my wall although I may have to move some of my current art around to make it fit (Hopefully this won't be a problem when I have my own house and lots of wall space!!)


I already have the perfect fabric from Amy Butler which I bought a while ago to make ducks, but I can always get more.  I don't like the plastic mesh showing so I planned to cover it with fabric, but unfortunately the cotton I had was far too fine and the earrings wouldn't fit through.  So instead I popped to the market and picked up a fine weaved hessian, I thought I could embellish it with the other fabrics to add some colour.  So watch this space!!


Whilst in the market the fabric lady was knitting a ruffled scarf, it was beautiful but looked very complicated.  She corrected me, in fact the wool made by a Spanish company called Katia comes already netted, so it is very quick and easy to knit supposedly. I just had to get some and Graeme picked out the sea blue colour.  Now I just have learn how to knit again and this is a bit different to normal as you knit through the edge of the wool, it all seems very confusing but that's what Mum's are for!!

This is what the final result will hopefully look like!!

Sunday 9 January 2011

Risky Crafting

I do apologise that I have not shown any new crafts over the past couple of weeks. One thing I have realised is that when Graeme is home I just don't seem to have any time to myself, I'm not complaining but I do feel a tad unproductive.  My other excuse is that my photo studio (the end of my desk, with a couple of desk lamps) has been taken over by an epic game of Risk; which we still haven't finished! We are level pegging at the moment, I'm yellow, Graeme is blue and the National Army is brown, it's a tense battle I'm currently trying to conquer Asia and North America, but Graeme is standing his ground in Europe!!


Anyway I thought I should show you some recycled earrings I made before I started my blog in the post below.

Recycled Earrings

Over the years my collection of beads, sequins and trinkets has grown quite large, and every time I break a piece of jewellery I can't bare to throw it away and instead it goes straight into my craft box.  So I have eventually decided to do something with my growing collection.  My inspiration for these has mostly came from other earrings I own and designs I have seen on the interewebs (Etsy is the best resource!).


This first pair was made from a pair of yellow and silver earrings I had.  I replaced the silver wires and beads with gold which now makes them a lot warmer and brighter.


I bought these blue sparkly gemstones from Hobby Craft but didn't know what to do with them, I found an excellent wire wrapped design on Etsy and used smaller multicoloured beads with gold wire, they look very elegant for a night out.


I liked the design a lot so made another pair from a beaded bracelet I purchased at a Charity shop.  The light green goes perfectly with quite a few dresses I own.  I am quite partial to green!!


The butterfly design was a bit of trial and error, I saw the initial outline of the butterfly split into two halfs on Etsy but thought I should embellish it a bit with swirls and multicoloured beads.  My only criticism is that I should have made this with thicker wire, as it is really easy to squash out of shape.


I bought earrings just like this from Matalan; the evening I wore them I lost one of the beads off then end, what a waste of a fiver.  I made these with beads I already had in my craft box so completely free, a lot more secure and still very stylish.


These two I made from left over sequins and beads.  The silver pair worked brilliantly, but I used much too thin a wire on the green pair the keep mis-shaping.  The best thing about making your own jewellery if you don't like it you can start all over again.

Thursday 6 January 2011

Lego Jewellery

Just found these bracelets and earrings on Folksy by Sisily Love, and I'm in love!!


Love jewellery, love Lego!! Is it wrong to start a Christmas wish list at the start of January??

Monday 3 January 2011

Lego Lego Lego

I love Lego, and recently I have had a renewed enthusiasm to play with it.  So this is my new section in the blog dedicated to Lego; I know it's not amazingly crafty but I have seen many creations made from Lego and of Lego on the web and I want to share my discoveries!!

Back in the Summer Graeme and I visited a pub in Nottingham called The Crusader which had the best large canvas artwork of Lego knights.  It was printed in different shade of grey with a hint of  red and yellow so it didn't look childish or gimicy and would have been perfect for my geek chic living room (I don't actually own a house yet but I have dreams!!) So ever since then I have been searching for Lego artwork and items to fill my imaginary house.  Unfortunately I am still yet to find the knight canvas so if you spot anything like it please let me know!! I may have to revisit the pub and ask them where they got it...

One of my favourite Lego themes is of course Star Wars, and a friend of mine reminded me of an awesome Empire Strikes Back Lego Chess set I had seen on the interwebs by Brandon Griffith.


There is even a campaign to get Lego to make it into a real set to buy, which would be awesome!!  I actually found this set to buy on Etsy, but at a little over £1700 I don't think I can afford it any time soon.  It is definitely going on my wish list though!! 


Failing that I will have to make one myself, although I think that could be pretty pricey too as the average Star Wars kit is around £50. Check out more photos of this set on flickr, and the chess board for  A New Hope.